
Are you dealing with a PS4 loud fan? Do you wonder how to make PS4 quieter? If you are, you’ve found the right article. We know how distracting it can be to play with a PS4 loud fan and many players have dealt with this issue. However, it can be fixed.
Though a PS4 loud fan is not too noticeable throughout the day, it can be very annoying during the night and it can put a damper on the experience. We all love playing at night and a loud fan can take us out of the immersion right when the videogame is getting exciting.
That’s why today we’re providing a list of all the possible solutions. Some of them will require you to take your PS4 apart and some of them won’t, but either of them will help you out. But before we get into all the ways you can fix a PS4/PS4 Pro loud fan, let’s understand why it gets so noisy in the first place.
» QUICK NAVIGATION «
Why Is My PS4 Fan So Loud?
“Why is my PS4 so loud?” is a question that pops into every owner’s mind at one point or another because it will eventually start to happen. So, let’s discuss the reasons why this happens to have a better understanding of the issue.
Dust
Dust is by far the most common reason for a PS4 loud fan. Why? Because it’s very difficult to escape it. Dust is everywhere and most of the time is invisible, so it builds up very easily.
You can keep the outside of your PS4/PS4 Pro clean, but the dust will still find its way into the console. The dust will accumulate inside and the more of it there is, the noisier your console will be.
You can keep the dust at bay with a dust cover, which you can put on the PS4/PS4 Pro while it’s not powered on. It will effectively block the dust between gaming sessions and keep the console sharp.
Consider the eXtremeRate dust cover, it’s inexpensive and will do its job. It will keep the console protected from dust and dirt and you won’t have to disconnect the cables to put it on the console.
Graphic Intensive Videogames
Some videogames are more graphic intensive than others, so they can be very demanding on the console. That will lead the CPU to overheat, which makes the fan work a lot harder. As the fan increases its speed to cool down the unit and keep up with it, it gets noisier. This also happens when a game is not properly installed, so you should check your games and make sure everything’s okay.
The Hard Drive
The hard drive on your PS4/PS4 Pro can also be making your console louder. If the hard drive is the source of a PS4 loud fan it’s because the platters are spinning as they seek data. That means the hard drive is starting to fail and you should get it checked as soon as possible because it’s not good news.
Faulty Parts or Wear and Tear
Faulty parts can make your PS4/PS4 Pro quite loud, so if you clean your console and find that it’s still making noise, this could be why. Not to mention, wear and tear leads to loose parts or screws, so that can be another reason why your console is making noise.
These issues aren’t just for Play Station but for Xbox fan noise as well.
How to Fix Noisy PS4/PS4 Pro?
If your PS4 loud fan is getting on your nerves, it’s time to do something about it. Now, you can fix your PS4/PS4 Pro loud fan by taking the console apart or without having to go through all that trouble. So, let’s take a look at different solutions in both categories!
How to Make PS4 Quieter Without Taking It Apart
You don’t necessarily have to take your PS4 apart to fix a loud fan. There are several things you can do to keep your PS4/PS4 Pro as quiet as possible and they are very simple.
Make Sure the Console Is in a Ventilated Spot
One of the easiest things you can do is move your PS4/PS4 Pro console to a well-ventilated area so the fan doesn’t have to work as hard. That way, it will stop being so loud and distracting.
Remember, your console features cooling vents on both sides and at the back. The vents on the side intake air while the ones at the back expel it. You want to make sure it gets optimum airflow on all sides because the cooling fan needs as much air as possible.
When you play, your PS4/PS4 Pro console gets heated, so the cooling fan gets into high gear. If your controller gets heated as well, the cooling fan will have to deal with extra strain so it has to work twice as hard.
That’s what causes the loud buzzing. By providing it with enough ventilation, the cooling fan won’t have to work as hard and the loud buzzing will be effectively prevented.
Place Your PS4/PS4 Pro Vertically
Most people place their PS4/PS4 Pro horizontally. However, if the fan is loud, changing its position might make a difference. Many people have found this solution very helpful because it can reduce or eliminate the noise and also prevent overheating issues. Give this a try and see if it works. If it doesn’t, you can try other fixes on the list.
Get a Cooling Stand for Your PS4/PS4 Pro
The cooling fan on the console is right on the bottom, which means that if you keep your PS4/PS4 Pro elevated, you will provide your unit with improved airflow. This will allow the fan to be quieter because it doesn’t have to work as hard.
Now, to elevate the console you can use any random object or you can invest in a cooling stand, which is designed to prevent overheating and will help prolong the life of the console.

A cooling stand such as the OIVO cooling stand is a great option to consider because it will keep the console in a vertical position and it will reduce the noise by 50 decibels. The metal bottom will keep the console cool and it features 12 game slots and a dual controller charger station, so it’s a ton of value for your money.
Put Your Vacuum Cleaner to Good Use
If you’ve found that the source of the noise is a PS4 loud fan, the issue is a lot easier to fix. Full disclosure, this is an unorthodox method and it may not be the best option because you risk causing damage to your console. However, if there’s dust buildup in the console, you can carefully use a vacuum cleaner to suck it all up.
This is very easy to do, but make sure you don’t use heavy suction because it can bring apart the inner parts of the console. If you’re going to try this method, make sure you choose the lowest suction setting or get a handheld vacuum, such as the BLACK & DECKER Cordless Dustbuster, and use it with caution.
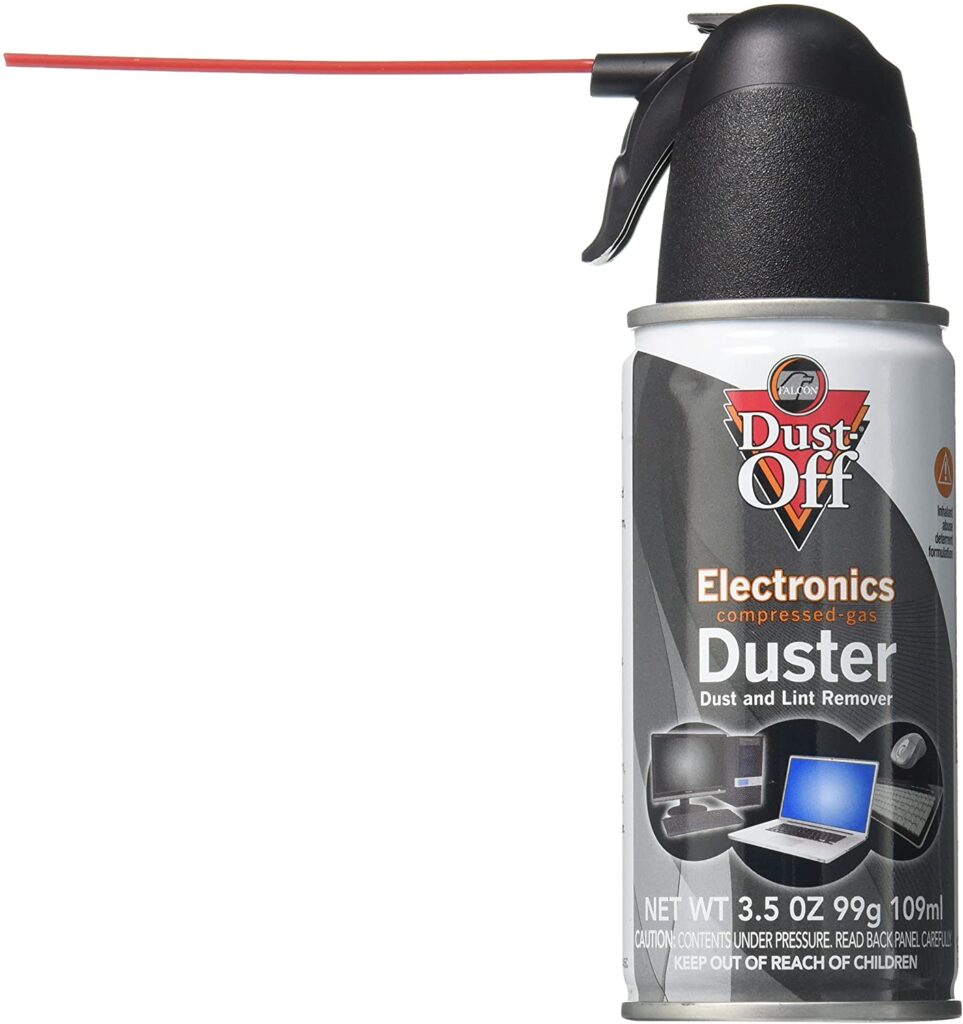
Get a Can of Compressed Air
If using a vacuum cleaner is too risky for you, a can of compressed air will do the trick and it’s a lot safer. Consider the Falcon Dust Off, which is super inexpensive and effective. It’s compact, ozone safe, and very easy to use. Once you have your can of compressed air, spray it through all the vents and inputs of your PS4/PS4 Pro console.
This will effectively get rid of dust, dirt, pet hair, and anything else that has been accumulated on the console. You should do this once a month as part of your maintenance routine (yes, you should have one) and you’ll see a big improvement.
Fix Any Corrupted Files in the System
A PS4 loud fan can be caused by corrupted files in the system because they make the cooling fan work harder as the console has to run countless functions at the same time. This also happens when games are not properly installed, which overloads the CPU and it overheats the unit.
Use Anti-Vibration Pads
Anti-vibration pads such as the XCEL anti-vibration pads provide another quick solution to a noisy console. These rubber mats are thick and solid, so they will reduce the noise your PS4/PS4 Pro console makes. They are high-quality with a tensile strength of 50 PSI and they are adhesive. Not to mention, you can easily cut them into any shape you like. This pack comes with 6 rubber pads and it’s fairly inexpensive.
As you can see, there are many different ways to fix a PS4 loud fan without having to take it apart. These solutions are very easy to apply and they will reduce or eliminate the noise effectively, not to mention some of them will even extend the life span of your console.
How to Make PS4 Quieter By Taking It Apart
If you tried to fix your PS4 loud fan without taking it apart and you didn’t find much success with any of the solutions we presented above, it means you have to try something different and you may have to open your console.
Keep in mind that taking your console apart may make your warranty void. So if you can still take advantage of your warranty, you should send it to Sony or a certified dealer so they can solve the issue.
If you can’t take advantage of your warranty anymore because your PS4/PS4 Pro is older, you can take it apart. Just make sure you do as much research as you need to feel confident enough to do this. We will provide a guide to help you through the process, so make sure to follow it well.
Step 1: Find the Screws
The first thing you need to do is find the screws, which are at the back of your PS4/PS4 Pro. The warranty sticker covers them, so you’ll have to peel it and your warranty will become void.
Step 2: Remove the Screws
Once you find the screws, you need to use a T8 or T8 Torx screwdriver to remove them. The screws have a small protrusion in the center and this screwdriver has a hollow tip that will fit right in there so you can loosen the screw. Unscrew them clockwise and they will come right off.
If you don’t have it, here’s the T8 Torx screwdriver, which is very affordable. The tip of the screwdriver is magnetized because it’s made for working with small screws and that makes things easier. It is easy to use and durable, so you will be able to use it for other things after you’re done with your PS4/PS4 Pro.
Step 3: Take the Plastic Cover Off
Once the screws are out and you’ve kept them in a safe place so you can put them back on later, you can take off the plastic cover at the bottom of your PS4/PS4 Pro. When the screws are all safely out, flip the console upside down so you can remove the plastic cover a lot easier. Tip it up from the back and slightly slide it forward. This will help you clear some of the wires and sharp edges on the front of the PS4/PS4 Pro.
Step 4: Clean the Cooling Fan Very Well
When the plastic cover is off, you can remove the top with a lot of ease. Once you do that, the fan will be exposed so you can see it clearly and get it clean. At this point, the can of compressed air can come in quite handy.
Make sure you hold the can correctly because if you don’t, it can expel a bit of liquid and damage other parts of your PS4/PS4 Pro. Hold the can upright and use it to clean the cooling fan.
If you are not confident using a can of compressed air, you can always use a soft microfiber towel to get the job done. Just make sure you clean the cooling fan thoroughly and get all the spots.
Step 5: Do the Same to All the Vents on the Console
Once the cooling fan is squeaky clean, you can move onto the vents. You have to clean them all, which are located at the top or bottom cover of your PS4/PS4 Pro. While you have the console open, you can clean the vents from the inside. Make sure you clean them thoroughly, using either the can of compressed air or the soft microfiber cloth.
Step 6: Leave the PS4/PS4 Pro Open
When you’re done cleaning everything, you need to leave the console open for at least half an hour before you close it back up. This is just in case. It will allow any liquid from the can of compressed air to dissipate before it damages anything on the console.
Step 7: Close the Console Back Up
When the half-hour is up and you’re certain the inside of the console is completely clean, you can close it back up. All you have to do is attach the bottom cover again and insert all the screws. Once the PS4/PS4 Pro is fully assembled, you can power it on and have a gaming session to see if the fan is quieter.
If you need some visual aid to take your PS4/PS4 Pro apart to clean the cooling fan and the vents from the inside, this YouTube video will help.
It’s easy to follow along, but make sure you read the guide first so you understand everything that needs to be done.
Replace the Cooling Fan on Your PS4/PS4 Pro
If your cooling fan needs to be replaced rather than cleaned because it’s malfunctioning and that’s what’s causing the noise, you can replace it. You can either get an expert to do this for you or you can do it yourself if you feel confident you can handle the task.
It will require some knowledge on console repair, so keep that in mind if you don’t want to cause damage to your PS4/PS4 Pro. If you have some knowledge and you feel confident about doing this on your own, these are the steps you need to follow:
- Flip your PS4/PS4 Pro upside down to remove the stickers on the rear vents.
- Unscrew the screws on the rear end.
- While your console is still upside down, light the rear side gently so you can take off the cover on the bottom of the console.
- The power supply unit of the console has 3 screws and there are 2 other screws on the corners, which you have to carefully remove. Make sure you put them aside in a safe place.
- Disconnect the power supply connector and lift the unit gently.
- Disconnect the ribbon wire from the optical drive of the console. Press the metal release tab and hold it down as you pull the ribbon wire. Be gentle.
- Next, you have to detach the same wire from the motherboard with the same technique.
- Once the optical device is free, unplug the cord from the motherboard.
- Disconnect the WiFi cord from the motherboard as well.
- Remove the screws.
- Pull out the WiFi antenna and detach the optical drive.
- Next, flip the PS4/PS4 Pro over and take out the left top panel. Press it back and lift it gently to find a few screws so you can take them out.
- Once you do that, the hard drive will be free so you can remove it.
- Lift the forepart of the cover on top of the console and take it off by sliding it backward. There will be 12 screws, so remove them all.
- Find the metal support bracket, unscrew the screws that are holding it, and take it off. Then, you can lift the metal cover to expose the components inside.
- Here, you’ll find a 3-wire plug that’s plugged into the motherboard. The wires are black, brown, and white. Disconnect them carefully.
- Remove the motherboard, which will separate the thermal paste that’s between the processor and the heat sink. So, before you put the console back together, you’ll have to reapply the thermal paste. Here’s a video that can help with that.
- Once the motherboard is off, you will find the cooling fan, but it will still have a metal plate over it. You have to unscrew it and lift the plate to remove it and expose the cooling fan.
- Now, you have to remove the screws to free the cooling fan from the rest of the internal components.
- Then, detach the cooling fan carefully and put the new one in place.
- Once you’ve screwed the new cooling fan in, reassemble your console by going through the same steps for disassembly but this time in reverse.
If you need additional guidance, this YouTube video will walk you through the entire process in more detail.
There are a lot of steps, so use this guide as a reference to keep yourself on track.
Is Your PS4 Still Loud After Cleaning It?
If you have cleaned your PS4/PS4 Pro but you find that the fan is still loud, there may be more going on than dust. For example, the thermal paste may need to be replaced or maybe the cooling fan itself needs to be replaced. We recommend you take the console to a professional and see what’s going on.
However, if your PS4 is quiet after you cleaned it and you want to keep it that way, make sure you clean your console at least once a week. Also, consider moving it to a well-ventilated area, putting it in a vertical position, or at least get a cooling stand so the cooling fan always has good ventilation and it doesn’t get overwhelmed.